

How to add custom fonts to Squarespace

Photo by Pexels
Using Custom CSS
Fonts are a simple but powerful way to make your website stand out. Squarespace lets you add custom fonts, giving your pages a unique and eye-catching look.
If you want to take advance of this feature, first find the font file on your computer. Font files usually end with OTF, TTF, or WOFF.
Once you have the file, you can upload it to your website and start customising your text.
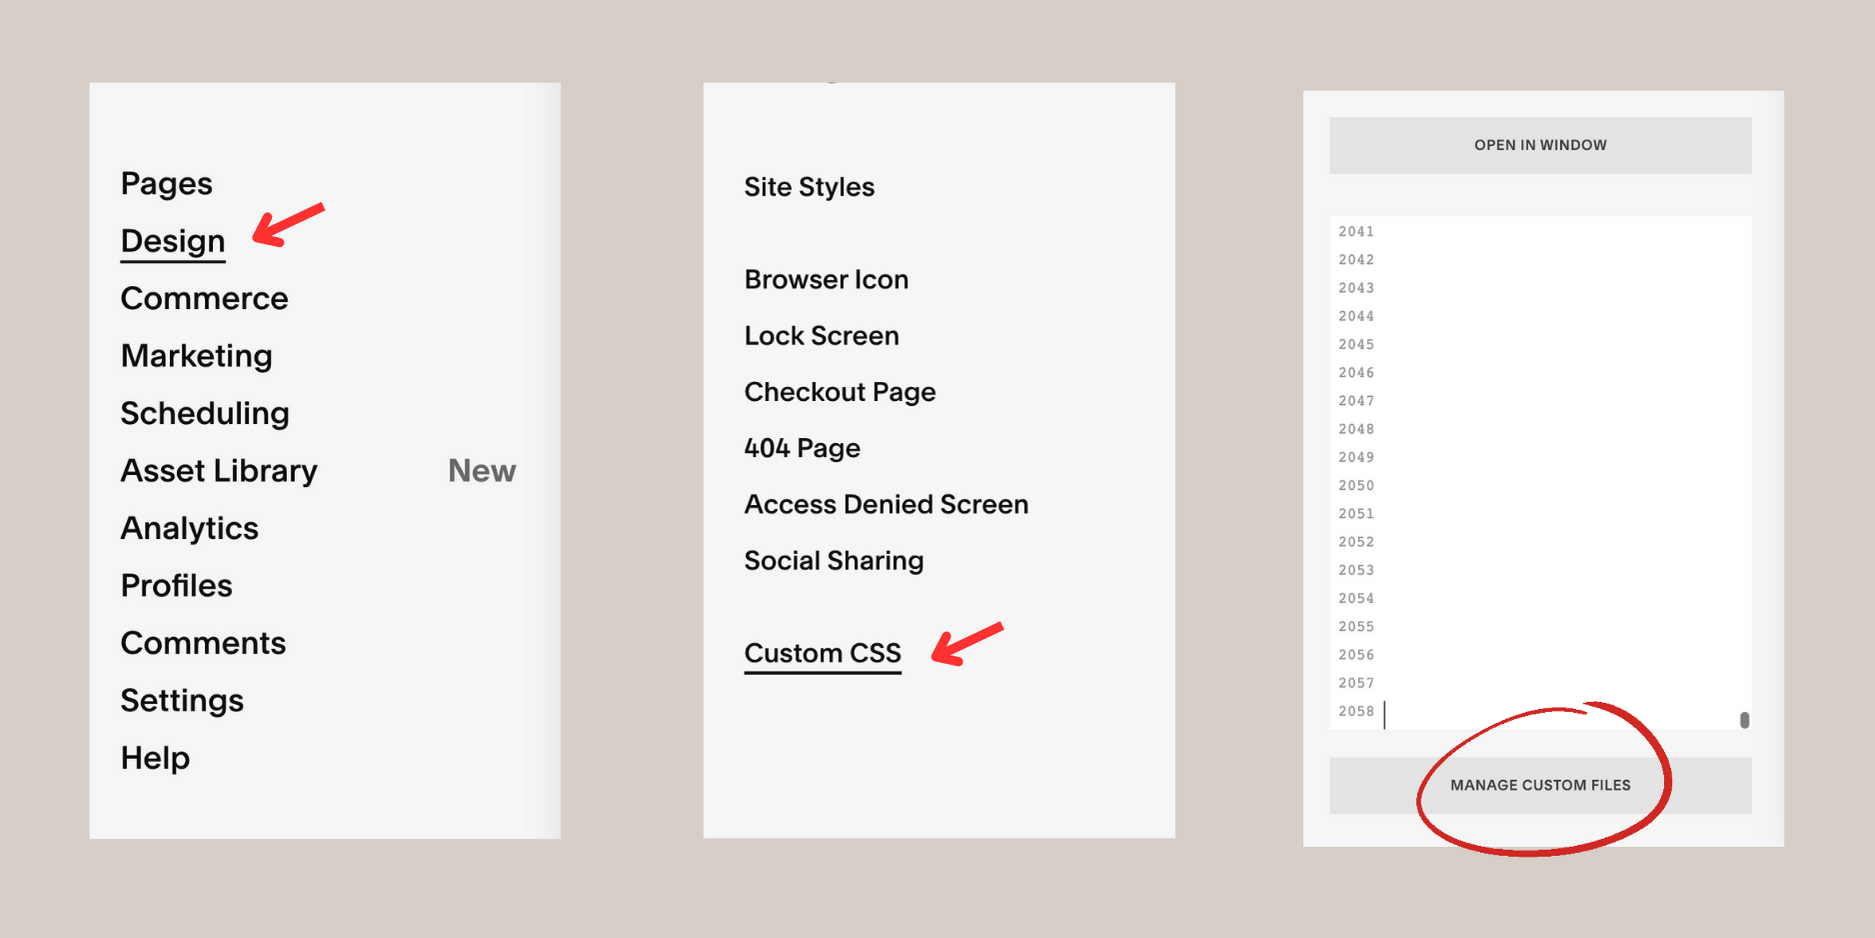
Go to your Squarespace menu and click Design > Custom CSS
Scroll down and locate the button that says Manage Custom Files.
Click Add Images or Fonts, and select your font file from the pop-out window.
Adding your font
Next, simply copy and paste the following CSS into the Custom CSS area.
/* Add Custom Font */

@font-face {
font-family: YOURFONT;
src: url();
}
Replace YOURFONT, with the name of your custom font. You can select any name for this, but make sure that you remember it as you will need to repeat this in a later step.
Next, you will need to add the URL of your font inbetween the brackets ().
When you upload a file within Squarespace, the platform will generate a URL for that file. This link must be placed in the designated brackets.
To insert this link, first click on the space between the brackets, and then select your uploaded font from the Manage Custom Files menu. The URL will automatically be added – and will look something like this:
@font-face {
font-family: Arial;
src: url(https://static1.squarespace.com/static/6359a96564d23a64223caed6/t/638f398e8dca010eadd163ea/1670330767138/Arial+Regular.ttf);
  }
PRO TIP
With Squarespace, you can upload font files ending in .WOFF or .OTF or .TTF. But, make sure that you’ve purchased the appropriate licence.
If you can’t find one you like, check out Creative Market for range of beautiful and affordable fonts.
Applying your font
Apply Your Custom Font
All that’s left to do is choose which Headings or Paragraphs your font will apply to.
In Squarespace 7.0, there’s four different Headings/Paragraphs you can change to your custom font.
These are:
Heading One h1
Heading Two h2
Heading Three h3
Paragraph p
In Squarespace 7.1, there’s seven different Headings/Paragraphs you can change to your custom font.
These are:
Heading One h1
Heading Two h2
Heading Three h3
Heading Four h4
Paragraph One .sqsrte-large
Paragraph Two p
Paragraph Three .sqsrte-small
Decide which Headings/Paragraphs you want to switch to your custom font, and copy and paste the appropriate CSS snippets.
h1 {
font-family: 'YOURFONT';
}

h2 {
font-family: 'YOURFONT';
}

h3 {
font-family: 'YOURFONT';
}

h4 {
font-family: 'YOURFONT';
}

.sqsrte-large {
font-family: 'YOURFONT';
}

p {
font-family: 'YOURFONT';
}

.sqsrte-small {
font-family: 'YOURFONT';
}
Replace YOURFONT with the name of your font – you entered this earlier in the first piece of CSS. It doesn’t matter what they’re called, but make sure they’re both spelled the same otherwise the CSS won’t work.